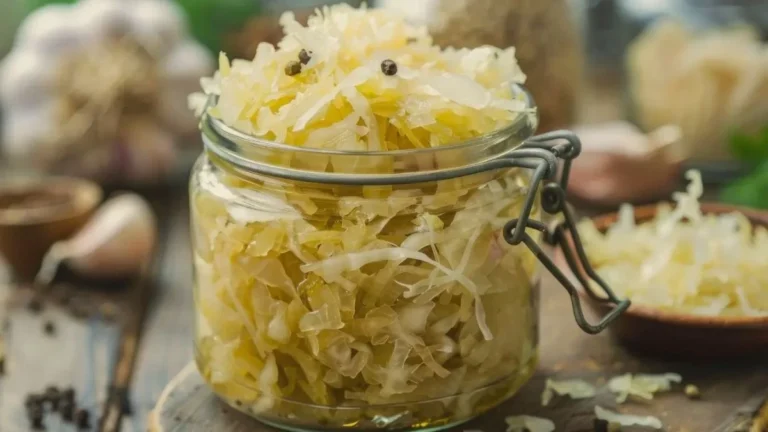
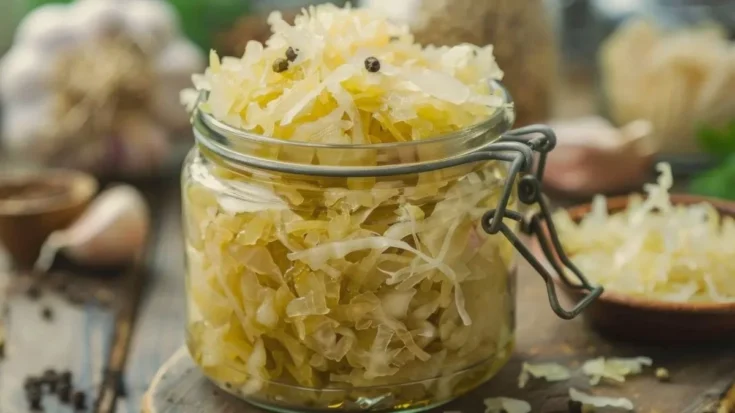
There’s something deeply satisfying about making your own homemade sauerkraut recipe from scratch. This Pioneer Woman sauerkraut recipe transforms humble cabbage into tangy, probiotic-rich fermented goodness that’s incredibly simple to prepare.
Whether you’re new to fermentation or a seasoned pro, this easy and delicious homemade sauerkraut requires just two essential ingredients-cabbage and salt-plus a little patience. The result? Crisp, flavorful sauerkraut that puts store-bought versions to shame.
This traditional fermentation method has been cherished for generations, and once you learn how to make sauerkraut at home, you’ll never go back to jarred varieties. It pairs beautifully with comfort classics like ambrosia salad, au gratin potatoes, chicken fettuccine alfredo, and ribeye roast, making it a versatile, probiotic-rich addition to both everyday meals and special occasions.
What Does It Taste Like?
This Pioneer Woman sauerkraut recipe with vinegar-free fermentation delivers a bright, tangy flavor with complex layers of umami and natural sourness. The cabbage develops a satisfying crunch with a pleasant acidic bite that’s never overwhelming.

When you add caraway seeds, you’ll notice warm, earthy notes reminiscent of rye bread, while grated carrots contribute subtle sweetness that balances the sour tang beautifully.
The fermentation process creates depth that evolves over time-younger sauerkraut tastes milder and crisper, while longer-fermented batches become more intensely sour with softer texture and deeper flavor complexity.
Pioneer Woman Sauerkraut Ingredients
- 1 large head of cabbage (about 1 kg or 2.2 lbs)
- 20 grams salt (1 heaping tablespoon)
- 1–2 small carrots (optional, for color and sweetness)
- Cabbage core, grated (optional)
- 1–2 outer cabbage leaves (reserved for covering)
Optional Add-ins:
- 2 teaspoons caraway seeds
- 2–3 bay leaves, hand-sliced
Kitchen Utensils
- Large mixing bowl
- Sharp chef’s knife or food processor with slicing disc
- Box grater
- Fermentation crock, large mason jar (half-gallon or larger), or food-grade container
- Fermentation weight or small glass jar filled with water
- Clean kitchen towel or lid
Preparation and Cooking Time
- Prep Time: 20 minutes
- Resting Time: 10–30 minutes (for salt to draw moisture)
- Fermentation Time: 1–4 weeks
- Total Time: 1–4 weeks
- Servings: Approximately 4 cups (about 32 servings of 2 tablespoons each)
Pioneer Woman Sauerkraut Recipe Instructions
Step 1: Prepare the Cabbage
Remove and discard 1 layer of tough outer leaves for organic cabbage or 2–3 layers for conventional cabbage. Reserve 1–2 whole, intact outer leaves for covering the sauerkraut later. Cut the cabbage in half through the core, then remove and set aside the core (you can grate it later if desired).
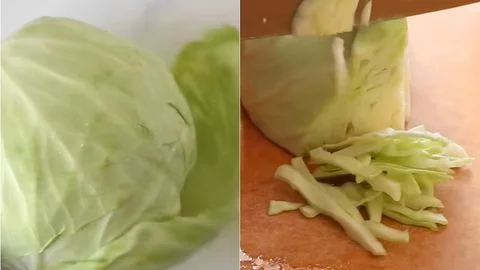
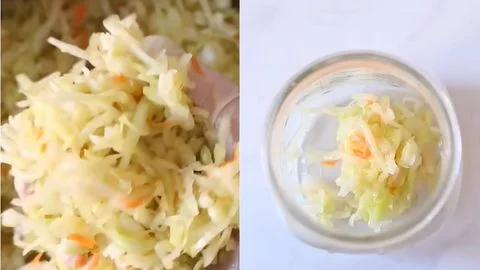
Step 2: Slice the Cabbage
Quarter each cabbage half and thinly slice into fine shreds, about ⅛-inch thick. Use a sharp chef’s knife for control or the slicing disc of a food processor for speed and consistency. Transfer all shredded cabbage to a large mixing bowl.
Step 3: Salt and Rest
Layer the shredded cabbage with salt, adding a handful of cabbage followed by a sprinkle of salt, repeating until all cabbage and salt are combined. Let the salted cabbage sit undisturbed for 10–30 minutes. This crucial step allows osmosis to occur as salt draws moisture from the cabbage cells, creating the brine needed for fermentation.
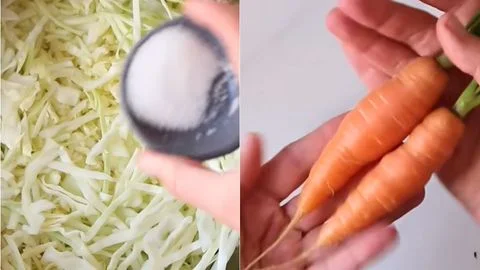
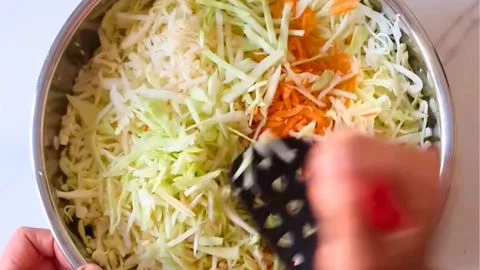
Step 4: Prepare Optional Ingredients
While the cabbage rests, grate 1–2 small carrots using a box grater. Finely grate the reserved cabbage core if using. Hand-slice 2–3 bay leaves into thin strips. Measure 2 teaspoons of caraway seeds if desired. Add any or all of these optional ingredients to the bowl with the resting cabbage.
Step 5: Massage the Cabbage
Using clean hands (or wear food-safe gloves), massage and squeeze the cabbage mixture vigorously for 5–10 minutes. The cabbage will become translucent, wilted, and release substantial liquid.
You can also use a potato masher or the end of a wooden rolling pin if preferred. Continue until enough brine forms to cover the cabbage when pressed down.
Step 6: Pack Into Container
Transfer the massaged cabbage and all its brine into your fermentation vessel-either a traditional fermentation crock, large mason jar, or food-grade container. Pack it down firmly with your fist or a clean utensil, pressing out air pockets and ensuring the cabbage is completely submerged beneath the liquid.
Step 7: Create a Barrier
Place one or two of the reserved whole cabbage leaves on top of the shredded mixture. This acts as a protective barrier, keeping the shreds submerged and preventing floaters that could develop mold.
Step 8: Weight and Seal
Place a fermentation weight on top of the cabbage leaf to keep everything submerged. A small glass jar filled with water works perfectly. If using a traditional fermentation crock, fill the water rim to create an airlock seal. For mason jars, you can use a fermentation lid with airlock or simply cover with a coffee filter secured with a rubber band.
Step 9: Ferment
Place the container in a cool, dry location away from direct sunlight at room temperature (65–75°F is ideal). Let it ferment for 1–4 weeks depending on your taste preference and ambient temperature. Warmer environments ferment faster.
Step 10: Monitor Daily
Check your sauerkraut daily during the first week. Press down on the weight if any cabbage rises above the brine level. You’ll notice bubbles forming-this is normal and indicates active fermentation. Some foam or white scum may appear on the surface; simply skim it off. If using a crock, add water to the rim as needed.
Step 11: Taste and Adjust
After one week, begin tasting your sauerkraut every few days. It will become increasingly tangy and sour over time. When it reaches your preferred level of sourness (anywhere from 1–4 weeks), it’s ready.
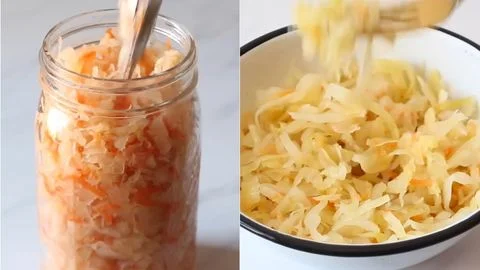
Step 12: Store
Once fermented to your liking, remove the weight and covering leaf. Transfer the sauerkraut to clean glass jars and refrigerate. The cold temperature dramatically slows fermentation, preserving your desired flavor profile.
Customization and Pairing for Serving Ideas
1. Classic German-Style Serving
Pair your homemade sauerkraut recipe with traditional bratwurst, knockwurst, or Polish kielbasa. Serve alongside creamy mashed potatoes and a dollop of grainy mustard. The tangy sauerkraut cuts through the richness of the sausages perfectly, creating that authentic biergarten experience right at home.
2. Reuben Sandwich Transformation
Layer your fermented cabbage between slices of toasted rye bread with corned beef, Swiss cheese, and Russian dressing for an iconic Reuben sandwich. The probiotic-rich sauerkraut adds essential tang and crunch that makes this deli classic irresistible. Grill until the cheese melts and the bread turns golden.
3. Buddha Bowl Topper
Add a generous scoop of this Pioneer Woman sauerkraut recipe to grain bowls featuring quinoa, roasted sweet potatoes, avocado, and tahini dressing. The fermented cabbage provides gut-healthy probiotics while adding bright acidity that balances creamy and earthy bowl components beautifully.
4. Eastern European Variation
Before fermenting, add thinly sliced beets alongside the carrots for a stunning pink-hued sauerkraut with earthy sweetness. This variation pairs wonderfully with pierogies, borscht, or served cold as a vibrant side salad with a drizzle of olive oil and fresh dill.
5. Spicy Korean-Inspired Twist
Transform this recipe into a kimchi-style kraut by adding 2 teaspoons of gochugaru (Korean red pepper flakes), 1 tablespoon grated fresh ginger, and 3 minced garlic cloves during the massaging step. This fusion creation works perfectly as a topping for rice bowls, tacos, or alongside grilled meats.
6. Breakfast Hash Enhancement
Fold sauerkraut into breakfast hash with crispy potatoes, caramelized onions, and fried eggs. The acidic bite cuts through the richness of runny yolks while adding probiotic benefits to your morning meal. This unexpected pairing creates complex flavor layers that elevate simple breakfast staples.
7. Hot Dog Bar Essential
Set up a gourmet hot dog station with your homemade sauerkraut alongside other toppings like pickled jalapeños, caramelized onions, and assorted mustards. The fermented cabbage is the star condiment that transforms basic franks into artisan-quality street food worthy of any backyard barbecue or game day spread.

Essential Tips for Perfect Sauerkraut
1. Salt Matters-Choose Wisely
Use pure sea salt, kosher salt, or pickling salt for this copycat Pioneer Woman sauerkraut recipe. Avoid iodized table salt, which contains anti-caking agents and iodine that can inhibit fermentation and create off-flavors or discoloration. The salt percentage matters too-aim for about 2% of the cabbage weight (20 grams salt per 1 kg cabbage) for optimal fermentation that prevents harmful bacteria while encouraging beneficial lactobacillus growth.
2. Master the Massage Technique
Don’t rush the massaging process when learning how to make sauerkraut. Spend at least 5–10 minutes squeezing and kneading the salted cabbage until it becomes limp and translucent, releasing enough liquid to create natural brine. If your cabbage seems dry (sometimes happens with older heads), you can add 2–3 tablespoons of filtered water to help submerge everything. Proper massaging is crucial-insufficient liquid leads to exposed cabbage that can mold.
3. Temperature Controls Fermentation Speed
Room temperature dramatically affects fermentation timeline. In warmer environments (75–80°F), your sauerkraut may be perfectly tangy in just 1–2 weeks, while cooler spaces (60–65°F) might require 3–4 weeks to develop the same flavor. Avoid placing your fermentation vessel near heat sources or in direct sunlight. Consistent, moderate temperatures between 65–75°F produce the best results with complex flavor development.
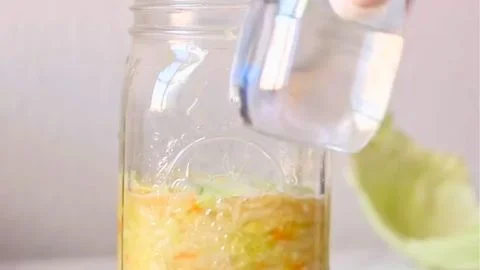
4. Submersion Is Non-Negotiable
The golden rule of successful fermentation: keep everything submerged beneath the brine at all times. Exposed cabbage develops mold because it’s in contact with oxygen. Check daily and press down if cabbage floats to the surface. If you notice the brine level dropping due to evaporation, make a simple saltwater solution (1 tablespoon salt dissolved in 2 cups water) and add just enough to cover the cabbage.
5. Embrace the Fermentation Signs
Bubbles, foam, cloudy brine, and mild fermented aroma are all positive indicators of active fermentation-not spoilage. Some white film (kahm yeast) may form on the surface; simply skim it off. However, trust your senses: if you see fuzzy mold (blue, green, black, or pink) or detect foul, rotten odors, discard the batch. Properly fermented sauerkraut smells pleasantly sour and tangy, never putrid.
6. Taste, Don’t Guess
Start tasting your easy and delicious homemade sauerkraut after one week to track flavor development. Everyone’s taste preference differs-some prefer mild, slightly crunchy kraut at 1–2 weeks, while others love intensely sour, softer sauerkraut at 3–4 weeks. There’s no single “done” point. When it tastes right to you, refrigerate it immediately to halt fermentation and lock in that perfect flavor profile.
7. Use Chlorine-Free Water
If you need to add water to your fermentation or rinse equipment, always use filtered, bottled, or boiled-and-cooled water. Tap water often contains chlorine or chloramine, which municipalities add to kill bacteria-but these chemicals also kill the beneficial bacteria essential for fermentation. Even small amounts can inhibit or completely prevent proper fermentation, resulting in failed batches.
Storage and Reheating Guidance
Store finished sauerkraut in clean glass jars with tight-fitting lids in the refrigerator for 4–6 months. The cold temperature preserves quality while allowing slow continued fermentation that deepens flavor. Always use clean utensils when serving to prevent contamination. Sauerkraut is traditionally enjoyed cold or at room temperature-heating destroys beneficial probiotics, though cooked sauerkraut still tastes delicious in hot dishes.
Pioneer Woman Sauerkraut Recipe
There’s something deeply satisfying about making your own homemade sauerkraut recipe from scratch. This Pioneer Woman sauerkraut recipe transforms humble cabbage into tangy, probiotic-rich fermented goodness that’s incredibly simple to prepare. Whether you’re new to fermentation or a seasoned pro, this easy and delicious homemade sauerkraut requires just two essential ingredients-cabbage and salt-plus a little patience. The result? Crisp, flavorful sauerkraut that puts store-bought versions to shame.
Ingredients
- 1 large head of cabbage
- 20 grams salt
- 1–2 small carrots
- Cabbage core, grated
- 1–2 outer cabbage leaves
- 2 teaspoons caraway seeds
- 2–3 bay leaves, hand-sliced
Instructions
Step 1: Prepare the Cabbage
Remove and discard 1 layer of tough outer leaves for organic cabbage or 2–3 layers for conventional cabbage. Reserve 1–2 whole, intact outer leaves for covering the sauerkraut later. Cut the cabbage in half through the core, then remove and set aside the core (you can grate it later if desired).
Step 2: Slice the Cabbage
Quarter each cabbage half and thinly slice into fine shreds, about ⅛-inch thick. Use a sharp chef’s knife for control or the slicing disc of a food processor for speed and consistency. Transfer all shredded cabbage to a large mixing bowl.
Step 3: Salt and Rest
Layer the shredded cabbage with salt, adding a handful of cabbage followed by a sprinkle of salt, repeating until all cabbage and salt are combined. Let the salted cabbage sit undisturbed for 10–30 minutes. This crucial step allows osmosis to occur as salt draws moisture from the cabbage cells, creating the brine needed for fermentation.
Step 4: Prepare Optional Ingredients
While the cabbage rests, grate 1–2 small carrots using a box grater. Finely grate the reserved cabbage core if using. Hand-slice 2–3 bay leaves into thin strips. Measure 2 teaspoons of caraway seeds if desired. Add any or all of these optional ingredients to the bowl with the resting cabbage.
Step 5: Massage the Cabbage
Using clean hands (or wear food-safe gloves), massage and squeeze the cabbage mixture vigorously for 5–10 minutes. The cabbage will become translucent, wilted, and release substantial liquid. You can also use a potato masher or the end of a wooden rolling pin if preferred. Continue until enough brine forms to cover the cabbage when pressed down.
Step 6: Pack Into Container
Transfer the massaged cabbage and all its brine into your fermentation vessel-either a traditional fermentation crock, large mason jar, or food-grade container. Pack it down firmly with your fist or a clean utensil, pressing out air pockets and ensuring the cabbage is completely submerged beneath the liquid.
Step 7: Create a Barrier
Place one or two of the reserved whole cabbage leaves on top of the shredded mixture. This acts as a protective barrier, keeping the shreds submerged and preventing floaters that could develop mold.
Step 8: Weight and Seal
Place a fermentation weight on top of the cabbage leaf to keep everything submerged. A small glass jar filled with water works perfectly. If using a traditional fermentation crock, fill the water rim to create an airlock seal. For mason jars, you can use a fermentation lid with airlock or simply cover with a coffee filter secured with a rubber band.
Step 9: Ferment
Place the container in a cool, dry location away from direct sunlight at room temperature (65–75°F is ideal). Let it ferment for 1–4 weeks depending on your taste preference and ambient temperature. Warmer environments ferment faster.
Step 10: Monitor Daily
Check your sauerkraut daily during the first week. Press down on the weight if any cabbage rises above the brine level. You’ll notice bubbles forming-this is normal and indicates active fermentation. Some foam or white scum may appear on the surface; simply skim it off. If using a crock, add water to the rim as needed.
Step 11: Taste and Adjust
After one week, begin tasting your sauerkraut every few days. It will become increasingly tangy and sour over time. When it reaches your preferred level of sourness (anywhere from 1–4 weeks), it’s ready.
Step 12: Store
Once fermented to your liking, remove the weight and covering leaf. Transfer the sauerkraut to clean glass jars and refrigerate. The cold temperature dramatically slows fermentation, preserving your desired flavor profile.
Notes
Store finished sauerkraut in clean glass jars with tight-fitting lids in the refrigerator for 4–6 months. The cold temperature preserves quality while allowing slow continued fermentation that deepens flavor. Always use clean utensils when serving to prevent contamination. Sauerkraut is traditionally enjoyed cold or at room temperature-heating destroys beneficial probiotics, though cooked sauerkraut still tastes delicious in hot dishes.
Nutrition Information:
Yield:
10Serving Size:
1Amount Per Serving: Calories: 30
Common Queries and FAQs
Here, we’ve got you covered with some common questions about the Pioneer Woman Sauerkraut Recipe that people often ask.
Do I need vinegar for this Pioneer Woman sauerkraut recipe?
No, this is a naturally fermented Pioneer Woman sauerkraut recipe with vinegar-free lacto-fermentation. The tangy, sour flavor develops from beneficial bacteria (lactobacillus) converting cabbage sugars into lactic acid during fermentation. Adding vinegar actually inhibits this natural process and creates quick-pickled cabbage rather than true fermented sauerkraut with probiotic benefits.
How long does homemade sauerkraut need to ferment?
Fermentation time ranges from 1–4 weeks depending on ambient temperature and personal taste preference. Warmer environments (75°F) ferment faster, potentially ready in 1–2 weeks, while cooler spaces (65°F) may need 3–4 weeks. Start tasting after one week and refrigerate when it reaches your desired tanginess. There’s no single “correct” fermentation length.
What type of salt should I use for making sauerkraut?
Use pure sea salt, kosher salt (without anti-caking additives), or pickling salt. Avoid iodized table salt, which contains iodine and anti-caking agents that can inhibit beneficial bacteria, cause discoloration, and create off-flavors. The salt should be pure without additives-read labels carefully before purchasing.
Why is my sauerkraut not producing enough brine?
Insufficient brine usually results from not massaging the cabbage long enough or using cabbage that’s old and dried out with less water content. Massage vigorously for at least 5–10 minutes until the cabbage becomes very limp and translucent. If still dry, add 2–3 tablespoons of chlorine-free water. Fresh, crisp cabbage produces more natural brine than older heads.
Can I use a regular mason jar instead of a fermentation crock?
Absolutely! Wide-mouth mason jars (half-gallon or quart-size) work perfectly for this homemade sauerkraut recipe. You don’t need specialized equipment. Use a smaller jar filled with water as a weight, and cover the opening with a coffee filter secured with a rubber band to allow gases to escape while keeping dust out. Fermentation crocks offer convenience but aren’t necessary.
Is the white film on top of my sauerkraut dangerous?
White film or scum (called kahm yeast) is harmless but undesirable. It’s not dangerous to consume, though it can create off-flavors. Simply skim it off with a clean spoon whenever you notice it. Kahm yeast develops when cabbage is exposed to air, so ensure everything stays submerged. It’s different from fuzzy mold (blue, green, black, or pink), which indicates spoilage requiring disposal.
How do I know when my sauerkraut is ready to eat?
Your sauerkraut is ready when it tastes pleasantly tangy and sour to your preference. Begin tasting after one week of fermentation. The flavor will continue developing-younger kraut (1–2 weeks) tastes milder and crunchier, while older batches (3–4 weeks) become more intensely sour with softer texture. Trust your taste buds-when you enjoy the flavor, it’s done.
What temperature is best for fermenting sauerkraut?
Ideal fermentation temperature ranges from 65–75°F (18–24°C). This range encourages beneficial lactobacillus bacteria while discouraging harmful microorganisms. Warmer temperatures speed fermentation but may create mushy texture, while cooler temperatures slow the process but often develop more complex flavors. Avoid temperatures above 80°F or below 60°F for best results.
Can I add other vegetables to my sauerkraut?
Yes! Carrots, beets, radishes, onions, garlic, ginger, apples, and various spices all make excellent additions. Add them during the massaging step so they ferment alongside the cabbage. Maintain the same salt ratio (about 2% of total vegetable weight). Different vegetables add unique flavors, colors, and nutritional benefits while fermenting safely using the same method.
Why does my sauerkraut taste too salty?
If your finished sauerkraut tastes excessively salty, you likely used too much salt initially or didn’t allow adequate fermentation time. The fermentation process mellows saltiness as bacteria convert sugars and develop sour flavors. Let it ferment longer-the tanginess will balance the salt. For future batches, measure salt precisely (2% of cabbage weight) rather than estimating.
How much sauerkraut should I eat for probiotic benefits?
Start with 1–2 tablespoons daily and gradually increase to ¼–½ cup if desired. Eating too much initially can cause digestive discomfort as your gut microbiome adjusts to the influx of beneficial bacteria. The probiotics are most potent in raw, unheated sauerkraut. Even small daily portions provide significant gut health benefits when consumed consistently.
Can I reuse the brine from one batch to start another?
While you can use previous brine as a starter to potentially speed fermentation, it’s unnecessary. Each fresh batch of salted, massaged cabbage creates its own natural brine with active bacteria. Reusing brine may introduce undesirable kahm yeast or inconsistent bacteria strains. For most reliable results, start each batch fresh with just cabbage and salt.
What should I do if I see mold on my sauerkraut?
If you spot fuzzy mold in colors like blue, green, black, or pink, discard the entire batch. Don’t try to scrape it off-mold sends invisible roots throughout the ferment. Mold indicates something went wrong: cabbage wasn’t submerged, too much oxygen exposure, or contamination. White film (kahm yeast) is harmless and can be skimmed off, but colored fuzzy mold means the batch isn’t safe.
Do I need special equipment to make sauerkraut at home?
No special equipment is required for this easy and delicious homemade sauerkraut. You only need a large bowl, knife or food processor, and any food-grade container (mason jars work great). A weight to keep cabbage submerged can be improvised with a smaller jar filled with water. Fermentation crocks with airlocks are convenient but optional. This accessibility is what makes fermentation so rewarding.
Making your own Pioneer Woman sauerkraut recipe at home is a rewarding, simple process that yields probiotic-rich fermented cabbage bursting with tangy flavor. This homemade sauerkraut recipe requires just minimal ingredients and patience, yet delivers results that far surpass store-bought versions.
Once you’ve mastered how to make sauerkraut using this traditional method, you’ll appreciate the depth of flavor, satisfying crunch, and gut-health benefits that only naturally fermented foods provide. Start your first batch today and discover why generations have treasured this timeless preservation technique!
You can also follow us on Pinterest, and YouTube for more delicious updates and kitchen inspiration. Your feedback and support mean the world to us!