There’s something deeply satisfying about biting into a Subway sandwich – and if we’re being honest, a huge part of that magic comes from the roll itself. That soft, slightly chewy, perfectly golden hoagie roll is what holds everything together, literally and figuratively.
But what if you could recreate that exact experience at home? This copycat Subway hoagie roll recipe makes it completely possible. With simple pantry ingredients and a little patience, you can bake fresh, fluffy hoagie rolls that rival anything you’d get at the counter.
Whether you’re building the ultimate sandwich for lunch or meal prepping for the week, this homemade hoagie roll recipe is the only one you’ll ever need. Serve it alongside subway chicken bacon ranch for a hearty meal, or enjoy it with frog jam for a sweet and savory pairing.
What Does It Taste Like?
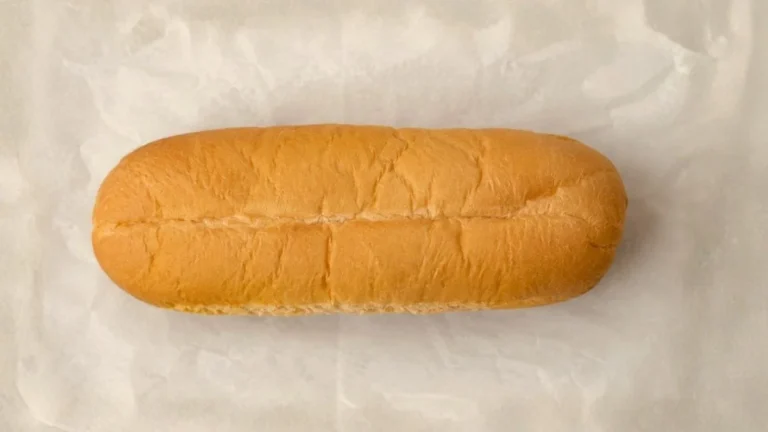
These homemade hoagie rolls are soft and pillowy on the inside with a thin, lightly golden crust on the outside – just like the real thing. The warm milk and butter give the dough a subtle richness that makes every bite feel indulgent without being overwhelming.

There’s a gentle sweetness from the sugar that balances beautifully with the savory saltiness of the dough. The egg adds a slight tenderness that keeps the crumb moist and airy.
Overall, the flavor is mild, clean, and neutral enough to complement any sandwich filling – from classic cold cuts to meatballs, grilled chicken, or veggie-loaded subs.
Subway Hoagie Roll Ingredients You’ll Need
For the Hoagie Rolls:
- 1 cup warm milk (just warm to the touch)
- 1 tablespoon instant yeast
- 2 tablespoons sugar
- 1 teaspoon salt
- 1 egg
- 3 tablespoons softened butter
- 3 to 3½ cups all-purpose flour or bread flour
Yield: Makes 4 hoagie rolls (recipe can be doubled or tripled)
Kitchen Utensils You’ll Need
- Large mixing bowl
- Stand mixer with dough hook (or hands for kneading)
- Measuring cups and spoons
- Clean kitchen towel or plastic wrap
- Baking sheet
- Nonstick cooking spray
- Sharp knife or bread lame (for scoring)
- Wire cooling rack
Preparation Time, Cooking Time, and Servings
- Prep Time: 20 minutes
- First Rise Time: 1 hour
- Second Rise Time: 30 minutes
- Bake Time: 12–15 minutes
- Total Time: Approximately 2 hours
- Servings: 4 hoagie rolls
How to Make Subway Hoagie Rolls – Step-by-Step Subway Hoagie Roll Recipe Instructions
Step 1: Activate the Yeast Mixture
In a large mixing bowl, combine 1 cup of warm milk and 1 tablespoon of instant yeast. Stir gently and let it sit for a minute to begin activating.

The milk should feel warm to the touch – not hot, as excessive heat can kill the yeast and prevent the dough from rising properly.
Step 2: Add the Wet Ingredients
To the yeast and milk mixture, add 2 tablespoons of sugar, 1 teaspoon of salt, 1 egg, and 3 tablespoons of softened butter.

Mix everything together well until the butter begins to incorporate and the mixture looks cohesive.
Step 3: Build the Dough
Add 3 cups of flour and begin mixing. Continue adding flour in small increments – up to ½ cup more – until the dough pulls cleanly away from the sides of the bowl.
The dough should feel tacky to the touch but should not stick to your hands. Avoid adding too much flour or the rolls will turn out dense.
Step 4: First Rise
Lightly spray a large bowl with nonstick cooking spray. Place the dough inside, turning it once so all sides are lightly coated.

Cover with a clean kitchen towel and set it in a warm spot. Let the dough rise until it has doubled in size, which takes approximately 1 hour.
Step 5: Shape the Rolls
Turn the risen dough out onto a clean surface. Roll it into a large rectangle about ¼ inch thick and roughly 24 inches wide. Cut the rectangle into 4 equal pieces.

Roll each piece up tightly from one long end, pinch the seams and ends firmly to seal, then roll gently back and forth to shape each roll evenly.
Step 6: Second Rise
Place the shaped rolls onto a lightly greased baking sheet, seam side down. Cover them with a towel and allow them to rise for another 30 minutes. During this time, preheat your oven to 375°F (190°C).
Step 7: Score and Bake
Once the rolls have puffed up nicely, use a sharp knife to lightly slash the top of each roll about ⅛ inch deep. This helps the rolls expand evenly during baking and gives them that classic hoagie look.

Bake for 12–15 minutes or until the tops are lightly golden brown.
Step 8: Cool and Slice
Remove the rolls from the oven and transfer them to a wire cooling rack. Allow them to cool completely before slicing.

Cutting into warm rolls can make the crumb gummy and collapse the soft interior – patience here is worth it!
Customization and Serving Ideas for Homemade Hoagie Rolls
One of the best things about making your own hoagie rolls from scratch is how easily you can customize them to suit any meal or occasion. Here are seven delicious ways to make them your own:
1. Classic Subway-Style Cold Cut Sub
Fill your freshly baked hoagie roll with turkey, ham, and salami. Layer on lettuce, tomatoes, onions, cucumbers, pickles, and your favorite sauce for a true copycat Subway sandwich experience that tastes just as good – if not better – than the original.
2. Meatball Marinara Hoagie
Stuff your roll with juicy homemade or store-bought meatballs, spoon over a generous helping of marinara sauce, and top with shredded mozzarella. Pop it under the broiler for a minute to melt the cheese and you have a meatball sub that’s absolutely irresistible.
3. Grilled Chicken and Veggie Sub
Load your hoagie roll with sliced grilled chicken breast, sautéed bell peppers, onions, and mushrooms. Drizzle with garlic aioli or honey mustard for a hearty, protein-packed sandwich that works perfectly for lunch or dinner.
4. Sesame or Everything Bagel Topping
Before baking, brush the tops of the rolls lightly with an egg wash and sprinkle with sesame seeds, poppy seeds, or everything bagel seasoning. This simple customization adds incredible flavor and a satisfying crunch to the crust.
5. Cheesy Garlic Hoagie Roll
After baking, slice the rolls open and spread with garlic butter. Add a generous layer of shredded mozzarella or provolone cheese and broil until melted and bubbly. These make an extraordinary side for soups, stews, and pasta dishes.
6. Breakfast Hoagie
Don’t limit your rolls to lunch and dinner. Fill them with scrambled eggs, crispy bacon, sausage, and a slice of cheddar cheese for an indulgent breakfast sandwich that puts any drive-through morning option to shame.
7. Italian Sub with Herb-Infused Dough
Add 1 teaspoon of dried Italian seasoning or garlic powder directly into the dough before the first rise. This subtle herb infusion pairs beautifully with classic Italian sub fillings like capicola, pepperoni, provolone, and banana peppers.

Pro Tips for Perfect Homemade Hoagie Rolls Every Time
Baking bread at home can feel intimidating, but these practical tips will help you nail this recipe for Subway hoagie rolls with confidence from the very first batch:
1. Use the Right Milk Temperature
Warm milk activates yeast effectively, but temperature matters enormously. Aim for around 100–110°F (38–43°C) – warm enough to feel comfortable on your wrist but not hot. Milk that is too hot will kill the yeast entirely and your dough will never rise properly.
2. Don’t Skip the Second Rise
The second rise after shaping is what gives these rolls their signature soft, airy interior. Skipping or rushing this step results in dense, bready rolls that lack that light, pillowy texture everyone loves. Give them the full 30 minutes.
3. Measure Flour Correctly
Too much flour is the most common bread-baking mistake. Spoon the flour into your measuring cup and level it off with a knife rather than scooping directly from the bag. Scooping packs the flour down and can add up to 20% more than needed, making rolls tough and dry.
4. Bread Flour vs. All-Purpose Flour
Both work in this recipe, but bread flour produces a chewier, more structured roll thanks to its higher protein content – very similar to what Subway uses. All-purpose flour gives a softer, more tender result. Choose based on your personal texture preference.
5. Score Confidently and Quickly
When slashing the tops of the rolls before baking, use a very sharp knife or bread lame and cut with one swift, confident motion. Hesitant, sawing cuts can deflate the dough. The scoring allows steam to escape and helps the rolls rise beautifully in the oven.
6. Cool Completely Before Slicing
It’s tempting to cut into freshly baked rolls right out of the oven, but resist! The interior is still finishing its cooking process as the rolls cool. Slicing too early creates a gummy, compressed crumb. Wait at least 20–30 minutes for the best texture.
7. Create the Perfect Rising Environment
If your kitchen is cool, yeast dough will rise slowly or unevenly. For a reliable warm environment, place the covered dough in a slightly warmed oven – turn it on for one minute, then turn it off before placing the dough inside. This simple trick speeds up the rise and gives consistent results every time.
Storage and Reheating Guidance
Store fully cooled hoagie rolls in an airtight zip-lock bag or wrapped tightly in plastic wrap at room temperature for up to 3 days. For longer storage, freeze them in a freezer-safe bag for up to 2 months. To reheat, wrap in foil and warm in a 350°F oven for 8–10 minutes until soft and fresh-tasting.
Subway Hoagie Roll Recipe
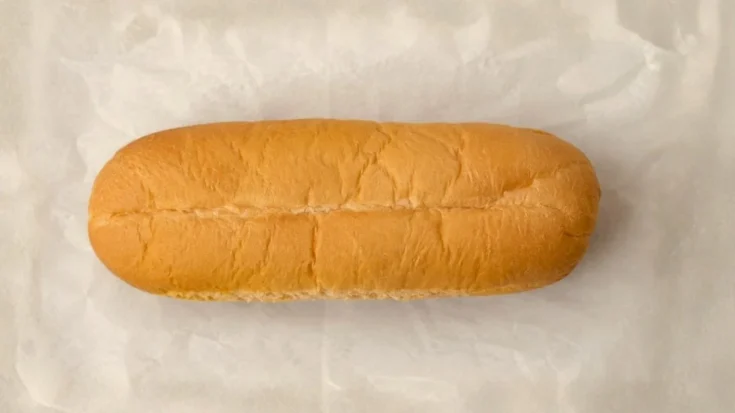
There’s something deeply satisfying about biting into a Subway sandwich – and if we’re being honest, a huge part of that magic comes from the roll itself. That soft, slightly chewy, perfectly golden hoagie roll is what holds everything together, literally and figuratively. But what if you could recreate that exact experience at home? This copycat Subway hoagie roll recipe makes it completely possible.
Ingredients
- 1 cup warm milk
- 1 tablespoon instant yeast
- 2 tablespoons sugar
- 1 teaspoon salt
- 1 egg
- 3 tablespoons softened butter
- 3 to 3½ cups all-purpose flour or bread flour
Instructions
Step 1: Activate the Yeast Mixture
In a large mixing bowl, combine 1 cup of warm milk and 1 tablespoon of instant yeast. Stir gently and let it sit for a minute to begin activating. The milk should feel warm to the touch – not hot, as excessive heat can kill the yeast and prevent the dough from rising properly.
Step 2: Add the Wet Ingredients
To the yeast and milk mixture, add 2 tablespoons of sugar, 1 teaspoon of salt, 1 egg, and 3 tablespoons of softened butter. Mix everything together well until the butter begins to incorporate and the mixture looks cohesive.
Step 3: Build the Dough
Add 3 cups of flour and begin mixing. Continue adding flour in small increments – up to ½ cup more – until the dough pulls cleanly away from the sides of the bowl. The dough should feel tacky to the touch but should not stick to your hands. Avoid adding too much flour or the rolls will turn out dense.
Step 4: First Rise
Lightly spray a large bowl with nonstick cooking spray. Place the dough inside, turning it once so all sides are lightly coated. Cover with a clean kitchen towel and set it in a warm spot. Let the dough rise until it has doubled in size, which takes approximately 1 hour.
Step 5: Shape the Rolls
Turn the risen dough out onto a clean surface. Roll it into a large rectangle about ¼ inch thick and roughly 24 inches wide. Cut the rectangle into 4 equal pieces. Roll each piece up tightly from one long end, pinch the seams and ends firmly to seal, then roll gently back and forth to shape each roll evenly
Step 6: Second Rise
Place the shaped rolls onto a lightly greased baking sheet, seam side down. Cover them with a towel and allow them to rise for another 30 minutes. During this time, preheat your oven to 375°F (190°C).
Step 7: Score and Bake
Once the rolls have puffed up nicely, use a sharp knife to lightly slash the top of each roll about ⅛ inch deep. This helps the rolls expand evenly during baking and gives them that classic hoagie look. Bake for 12–15 minutes or until the tops are lightly golden brown.
Step 8: Cool and Slice
Remove the rolls from the oven and transfer them to a wire cooling rack. Allow them to cool completely before slicing. Cutting into warm rolls can make the crumb gummy and collapse the soft interior – patience here is worth it!
Notes
Store fully cooled hoagie rolls in an airtight zip-lock bag or wrapped tightly in plastic wrap at room temperature for up to 3 days. For longer storage, freeze them in a freezer-safe bag for up to 2 months. To reheat, wrap in foil and warm in a 350°F oven for 8–10 minutes until soft and fresh-tasting.
Nutrition Information:
Yield:
6Serving Size:
1Amount Per Serving: Calories: 80
Common Queries and FAQs
Here, we’ve got you covered with some common questions about the Subway Hoagie Roll Recipe that people often ask.
What makes Subway’s hoagie rolls so soft?
Subway’s hoagie rolls get their signature softness from a combination of enriched dough ingredients – milk, eggs, butter, and sugar – that tenderize the gluten and keep the crumb moist. This homemade version uses the same enriched dough technique to recreate that same pillowy, soft texture right at home.
What is the difference between a hoagie roll and a sub roll?
The terms are often used interchangeably, but there are subtle regional differences. Hoagie rolls are typically associated with Philadelphia-style sandwiches and tend to be slightly softer with a thinner crust. Sub rolls can sometimes have a crustier exterior. For practical purposes, both refer to the same long sandwich roll used for subs and hoagies.
Can I make this hoagie roll recipe without a stand mixer?
Absolutely. You can mix and knead this dough entirely by hand. Simply combine the ingredients in a large bowl, then turn the dough out onto a lightly floured surface and knead by hand for about 8–10 minutes until smooth and elastic. It takes a bit more effort but produces the same delicious result.
Why didn’t my hoagie rolls rise properly?
The most common culprit is inactive or dead yeast – usually caused by milk that was too hot or too cold, or yeast that has expired. Always check your yeast’s expiration date and use milk at the right temperature. Another reason could be a cold kitchen environment, which slows yeast activity significantly.
Can I make the dough ahead of time?
Yes! You can prepare the dough through the first rise, then punch it down, cover it tightly, and refrigerate it overnight. The cold temperature slows the yeast activity significantly, allowing the dough to rise slowly in the refrigerator. The next day, let it come to room temperature for about 30 minutes before shaping and proceeding with the second rise.
Can I freeze the baked hoagie rolls?
Yes, these rolls freeze very well. Allow them to cool completely, then wrap each roll individually in plastic wrap and place them in a freezer-safe bag. They will keep in the freezer for up to 2 months. Thaw at room temperature or warm in the oven for a fresh-baked feel.
What flour works best for homemade hoagie rolls?
Both all-purpose flour and bread flour work well in this recipe. Bread flour has a higher protein content which develops more gluten, resulting in a chewier, more structured roll – very close to the Subway texture. All-purpose flour produces a softer, more delicate crumb. Either option delivers excellent results depending on your personal preference.
Making fresh hoagie rolls at home is one of those simple baking wins that feels incredibly rewarding. With this copycat Subway hoagie roll recipe, you get soft, chewy, golden rolls that are perfect for any sandwich creation you can dream up.
Whether you’re feeding a hungry family, hosting a casual get-together, or simply craving a great homemade sub, this homemade hoagie roll recipe delivers every single time. Once you taste how good fresh-baked rolls can be, store-bought will simply never cut it again. Go ahead, preheat that oven, and let’s get baking!
You can also follow us on Pinterest, and YouTube for more delicious updates and kitchen inspiration. Your feedback and support mean the world to us!