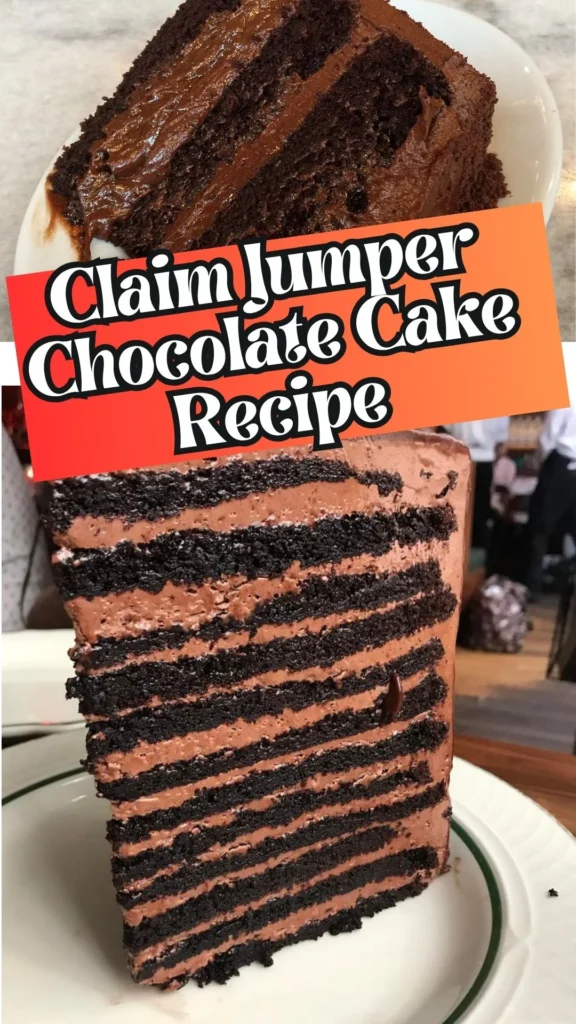
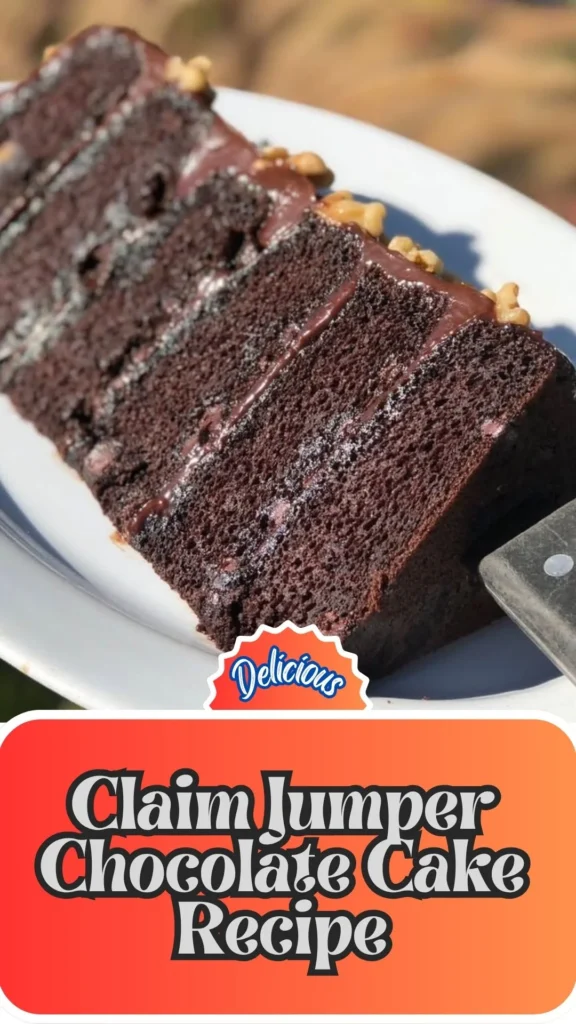
If you’ve ever sat down at Claim Jumper restaurant and taken one forkful of their legendary chocolate cake, you already know why people search endlessly for a copycat Claim Jumper chocolate cake recipe.
That towering, fudgy, deeply chocolatey masterpiece has left dessert lovers obsessed for decades. The good news? You don’t need a reservation to enjoy it anymore.
Whether you’re baking for a birthday, a celebration, or simply because chocolate is always a good idea, this recipe delivers that iconic experience every single time.
What Does the Claim Jumper Chocolate Cake Taste Like?
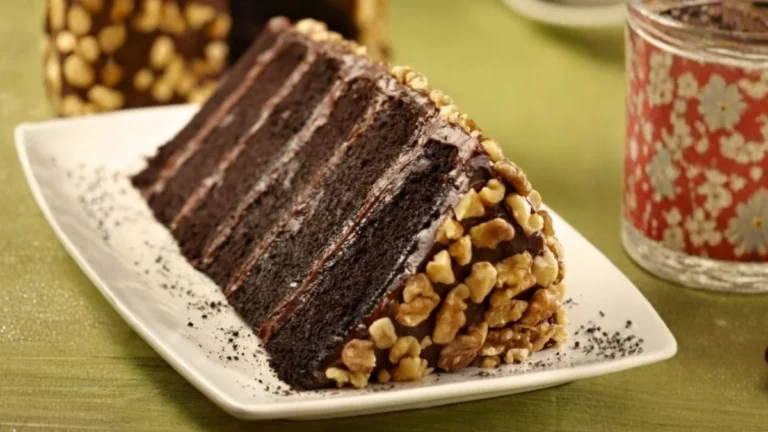
The Claim Jumper Chocolate Motherlode Cake is the definition of chocolate indulgence. Each bite delivers deep, bittersweet cocoa flavor from the moist, fudgy cake layers, balanced beautifully by a silky, mousse-like chocolate cream that melts the moment it touches your tongue.
The brewed coffee in the batter doesn’t make it taste like coffee – instead, it intensifies the chocolate flavor to a whole new level. The dark chocolate cream adds a luxurious, almost truffle-like richness that ties everything together.
It’s bold, it’s decadent, and it’s the kind of chocolate cake that ruins every other cake for you permanently.
Claim Jumper Chocolate Cake Ingredients You’ll Need
For the Cake Batter
- Sugar – quantity as per your preference
- All-purpose flour – 1¾ cups
- Unsweetened natural cocoa powder – 1 cup
- Baking soda – 1 heaping teaspoon
- Baking powder – 1 heaping teaspoon
- Salt – ⅓ teaspoon
- Eggs – 2 (room temperature)
- Vegetable oil – ½ cup
- Milk – 1 cup (room temperature)
- Vanilla extract – 1–2 teaspoons
- Brewed coffee – 1 teaspoon instant coffee dissolved in boiling water (full cup added to batter)
And for the Chocolate Cream
- Heavy cream (35% fat) – 1⅓ cups total (⅔ cup for whipping + ⅔ cup for yolk mixture)
- Egg yolks – 3
- Sugar – 1 teaspoon (for whipped cream) + 1–3 tablespoons (for yolk mixture, adjust to taste)
- Dark chocolate (70% cocoa or higher) – 2 bars, finely chopped
Kitchen Utensils You’ll Need
- Two round cake baking molds
- Parchment paper
- Large mixing bowl
- Whisk or electric hand mixer
- Sifter or fine mesh strainer
- Rubber spatula
- Small saucepan
- Two separate medium bowls (for cream components)
- Rotating cake stand (optional but recommended)
- Fork or spoon (for decorating)
- Serrated knife (for leveling layers if needed)
Preparation Time, Cooking Time & Servings
- Preparation Time: 25–30 minutes
- Cooking Time: 30 minutes
- Cooling & Assembly Time: 30–40 minutes
- Total Time: Approximately 1 hour 30 minutes
- Servings: 10–12 slices
How to Make the Claim Jumper Chocolate Cake – Step-by-Step Claim Jumper Chocolate Cake Recipe Instructions
Step 1: Mix the Dry Ingredients
In a large mixing bowl, combine sugar, sifted all-purpose flour, unsweetened cocoa powder, baking soda, baking powder, and salt. Whisk them together until evenly blended, then create a small well in the center.
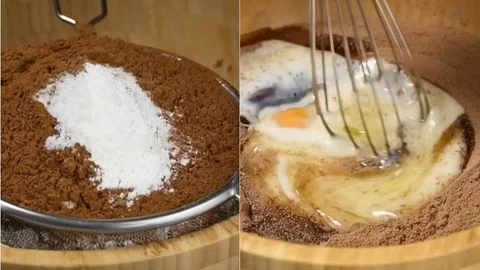
Step 2: Add the Wet Ingredients
Crack in the eggs, pour in the vegetable oil, milk, and vanilla extract directly into the well. Begin mixing from the center outward, gradually incorporating the dry ingredients into the wet until a smooth batter begins to form.
Step 3: Add the Brewed Coffee
Brew your coffee by dissolving 1 teaspoon of instant coffee in boiling water. Slowly pour the hot coffee into the batter while mixing continuously. The batter will be quite thin and runny – this is completely normal and exactly what creates those moist, fudgy layers.
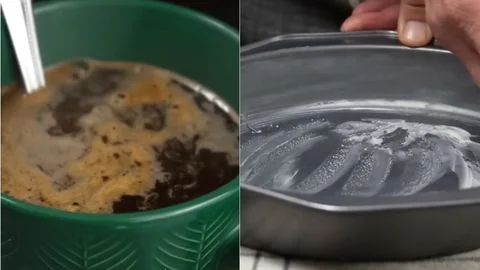
Step 4: Prepare Your Pans and Bake
Preheat your oven to the appropriate temperature (350°F / 175°C). Grease your baking molds thoroughly and line the bottoms with parchment paper. Divide the batter evenly between both pans. Bake for approximately 30 minutes, staggering the pans on different racks if needed. Check for doneness with a toothpick – it should come out with just a few moist crumbs.
Step 5: Cool the Cake Layers
Allow the cakes to cool inside the molds for about 10 minutes. Then gently tap and turn them out onto a wire rack.

Let them cool completely before assembling – this step is critical to prevent the chocolate cream from melting.
Step 6: Make the Whipped Cream Base
Pour ⅔ cup of chilled heavy cream into a cold bowl. Whip until it begins to thicken, then add 1 teaspoon of sugar. Continue whipping until stiff peaks form. Set aside in the refrigerator.
Step 7: Make the Chocolate Custard
Finely chop both bars of dark chocolate and set aside. In a separate bowl, whisk 3 egg yolks with 1–3 tablespoons of sugar until the mixture turns pale and smooth. Add the remaining ⅔ cup of heavy cream and stir to combine.
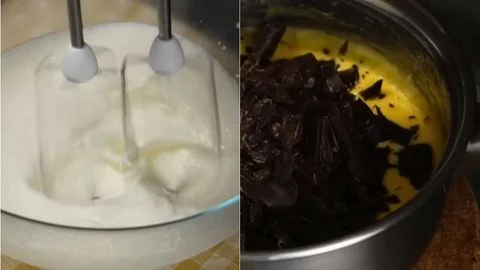
Transfer to a saucepan and cook over medium heat, stirring constantly, until the mixture thickens. Do not allow it to boil. Remove from heat immediately and stir in the chopped dark chocolate until fully melted and glossy.
Step 8: Fold and Assemble the Chocolate Cream
Allow the chocolate custard to cool slightly, then gently fold it into the whipped cream using a rubber spatula. Work quickly but carefully – the cream will begin to set as it cools.
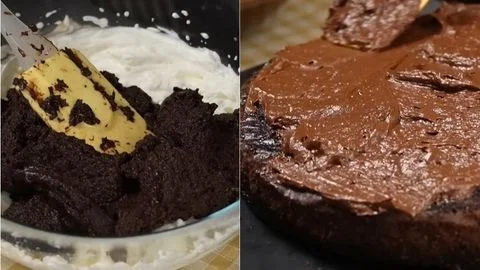
Step 9: Layer and Frost the Cake
Place the first cake layer on your serving plate or rotating cake stand. Spread a generous layer of chocolate cream across the top. Add the second layer and repeat. Use the remaining cream to frost the top and sides of the cake completely.
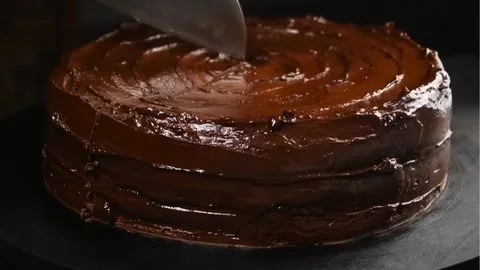
Step 10: Decorate and Set
For that signature textured finish reminiscent of the original Claim Jumper Chocolate Motherlode Cake, drag a fork or the back of a spoon across the surface in gentle lines while slowly rotating the stand. Allow the cake to set for at least 20–30 minutes before slicing and serving.
Customization and Serving Ideas for the Claim Jumper Chocolate Cake
One of the best things about making the best Claim Jumper chocolate cake recipe at home is the freedom to make it entirely your own. Here are seven delicious ways to customize and serve this showstopper:
1. Add a Ganache Drip
Take the presentation up a notch by pouring a warm dark chocolate ganache over the top of the frosted cake and letting it drip naturally down the sides. It adds a dramatic, bakery-style look with zero extra effort and doubles down on that rich chocolate intensity.
2. Layer in a Raspberry Filling
Spread a thin layer of seedless raspberry jam or fresh raspberry compote between the cake layers before adding the chocolate cream. The tartness of the berry cuts through the richness beautifully and adds a pop of fruity contrast.
3. Make It a Triple Layer
Divide the batter among three pans instead of two for a taller, even more impressive cake. Use slightly less cream between each layer and save the most generous portion for the outside coating.
4. Serve with Vanilla Bean Ice Cream
A warm or room-temperature slice paired with a scoop of cold vanilla bean ice cream is a combination that mirrors the restaurant experience perfectly. The cool creaminess against the dense, fudgy cake is nothing short of magical.
5. Top with Chocolate Shavings or Curls
Use a vegetable peeler to shave curls from a bar of dark or milk chocolate directly onto the top of the finished cake. This simple decoration adds texture, elegance, and an extra hit of chocolate flavor.
6. Go Mocha with an Espresso Glaze
Brush the baked cake layers lightly with a mixture of brewed espresso and a little sugar before assembling. This subtle mocha note deepens the flavor profile without overpowering the chocolate, making it ideal for coffee lovers.
7. Pair with Fresh Whipped Cream on the Side
Keep it classic and simple – a dollop of lightly sweetened fresh whipped cream alongside each slice balances the richness of the dark chocolate cream and makes every bite feel a little lighter.
Expert Tips for the Perfect Claim Jumper Chocolate Cake
Getting every element right is what separates a good chocolate cake from a truly unforgettable one. These tips will help you nail this easy Claim Jumper chocolate cake recipe from start to finish:
1. Use Room Temperature Eggs and Milk
Cold eggs and milk can cause the batter to seize or mix unevenly. Bringing them to room temperature beforehand helps them incorporate smoothly into the dry ingredients, resulting in a more uniform, tender crumb.
2. Don’t Skip the Brewed Coffee
It might seem like an unusual addition, but the brewed coffee is one of the most important ingredients in this recipe. It doesn’t add a coffee flavor – it amplifies and deepens the cocoa, giving the cake that restaurant-quality intensity that makes it so memorable.
3. Sift Your Cocoa Powder and Flour
Cocoa powder is notorious for clumping. Always sift it along with the flour before mixing to ensure a smooth, lump-free batter. This small step makes a significant difference in the final texture of your cake layers.
4. Do Not Overbake
The biggest enemy of a fudgy chocolate cake is overbaking. Start checking at the 25-minute mark. The cake is done when a toothpick inserted in the center comes out with a few moist crumbs – not completely clean. Completely clean means it’s already overdone.
5. Let the Chocolate Custard Cool Before Folding
If your chocolate custard is still hot when you fold it into the whipped cream, it will deflate the cream entirely and you’ll lose that light, mousse-like texture. Let it cool to just above room temperature – warm to the touch, not hot – before folding.
6. Chill Your Bowl Before Whipping Cream
For the best stiff peaks, place your mixing bowl and beaters in the freezer for 10–15 minutes before whipping the heavy cream. Cold equipment makes a significant difference, especially in warmer kitchens.
7. Assemble on a Rotating Cake Stand
A rotating cake stand isn’t just for looks – it gives you control and precision when spreading the chocolate cream across the layers and sides. Combined with the fork-drag decoration technique, it helps you achieve that professional, textured finish that makes this cake look as stunning as it tastes.
Storage and Reheating Guidance
Store leftover cake in an airtight container in the refrigerator for up to 4 days. For the best texture and flavor, bring individual slices to room temperature for 15–20 minutes before serving. This cake is not recommended for microwave reheating as the chocolate cream may separate.
Claim Jumper Chocolate Cake Recipe

If you’ve ever sat down at Claim Jumper restaurant and taken one forkful of their legendary chocolate cake, you already know why people search endlessly for a copycat Claim Jumper chocolate cake recipe. That towering, fudgy, deeply chocolatey masterpiece has left dessert lovers obsessed for decades. The good news? You don’t need a reservation to enjoy it anymore.
Ingredients
- Sugar – quantity as per your preference
- All-purpose flour – 1¾ cups
- Unsweetened natural cocoa powder – 1 cup
- Baking soda – 1 heaping teaspoon
- Baking powder – 1 heaping teaspoon
- Salt – ⅓ teaspoon
- Eggs – 2 (room temperature)
- Vegetable oil – ½ cup
- Milk – 1 cup (room temperature)
- Vanilla extract – 1–2 teaspoons
- Brewed coffee – 1 teaspoon instant coffee dissolved in boiling water (full cup added to batter)
- And for the Chocolate Cream
- Heavy cream (35% fat) – 1⅓ cups total (⅔ cup for whipping + ⅔ cup for yolk mixture)
- Egg yolks – 3
- Sugar – 1 teaspoon (for whipped cream) + 1–3 tablespoons (for yolk mixture, adjust to taste)
- Dark chocolate (70% cocoa or higher) – 2 bars, finely chopped
Instructions
Step 1: Mix the Dry Ingredients
In a large mixing bowl, combine sugar, sifted all-purpose flour, unsweetened cocoa powder, baking soda, baking powder, and salt. Whisk them together until evenly blended, then create a small well in the center.
Step 2: Add the Wet Ingredients
Crack in the eggs, pour in the vegetable oil, milk, and vanilla extract directly into the well. Begin mixing from the center outward, gradually incorporating the dry ingredients into the wet until a smooth batter begins to form.
Step 3: Add the Brewed Coffee
Brew your coffee by dissolving 1 teaspoon of instant coffee in boiling water. Slowly pour the hot coffee into the batter while mixing continuously. The batter will be quite thin and runny – this is completely normal and exactly what creates those moist, fudgy layers.
Step 4: Prepare Your Pans and Bake
Preheat your oven to the appropriate temperature (350°F / 175°C). Grease your baking molds thoroughly and line the bottoms with parchment paper. Divide the batter evenly between both pans. Bake for approximately 30 minutes, staggering the pans on different racks if needed. Check for doneness with a toothpick – it should come out with just a few moist crumbs.
Step 5: Cool the Cake Layers
Allow the cakes to cool inside the molds for about 10 minutes. Then gently tap and turn them out onto a wire rack. Let them cool completely before assembling – this step is critical to prevent the chocolate cream from melting.
Step 6: Make the Whipped Cream Base
Pour ⅔ cup of chilled heavy cream into a cold bowl. Whip until it begins to thicken, then add 1 teaspoon of sugar. Continue whipping until stiff peaks form. Set aside in the refrigerator.
Step 7: Make the Chocolate Custard
Finely chop both bars of dark chocolate and set aside. In a separate bowl, whisk 3 egg yolks with 1–3 tablespoons of sugar until the mixture turns pale and smooth. Add the remaining ⅔ cup of heavy cream and stir to combine. Transfer to a saucepan and cook over medium heat, stirring constantly, until the mixture thickens. Do not allow it to boil. Remove from heat immediately and stir in the chopped dark chocolate until fully melted and glossy.
Step 8: Fold and Assemble the Chocolate Cream
Allow the chocolate custard to cool slightly, then gently fold it into the whipped cream using a rubber spatula. Work quickly but carefully – the cream will begin to set as it cools
Step 9: Layer and Frost the Cake
Place the first cake layer on your serving plate or rotating cake stand. Spread a generous layer of chocolate cream across the top. Add the second layer and repeat. Use the remaining cream to frost the top and sides of the cake completely
Step 10: Decorate and Set
For that signature textured finish reminiscent of the original Claim Jumper Chocolate Motherlode Cake, drag a fork or the back of a spoon across the surface in gentle lines while slowly rotating the stand. Allow the cake to set for at least 20–30 minutes before slicing and serving.
Notes
Store leftover cake in an airtight container in the refrigerator for up to 4 days. For the best texture and flavor, bring individual slices to room temperature for 15–20 minutes before serving. This cake is not recommended for microwave reheating as the chocolate cream may separate.
Nutrition Information:
Yield:
8Serving Size:
1Amount Per Serving: Calories: 220
Common Queries and FAQs
Here, we’ve got you covered with some common questions about the Claim Jumper Chocolate Cake Recipe that people often ask.
What is the Claim Jumper Chocolate Motherlode Cake?
The Claim Jumper Chocolate Motherlode Cake is the signature dessert from Claim Jumper restaurant – a massive, multi-layer chocolate cake famous for its deep, fudgy layers and ultra-rich chocolate frosting. This copycat recipe recreates that iconic experience at home with accessible ingredients and straightforward steps.
Can I make this cake without coffee?
Technically yes, but it’s not recommended. The brewed coffee doesn’t flavor the cake – it intensifies the chocolate. If you must skip it, substitute with the same amount of hot water. However, you will notice a difference in the depth of flavor.
Why is my cake batter so runny?
This is completely normal for this recipe. The addition of hot brewed coffee makes the batter thinner than a typical cake batter. The high liquid content is exactly what produces the signature moist, fudgy texture once baked. Trust the process.
Can I use milk chocolate instead of dark chocolate for the cream?
You can, but the result will be noticeably sweeter and less complex. The original Claim Jumper chocolate cake gets its richness and depth from dark chocolate with at least 70% cocoa content. Using milk chocolate will produce a milder, sweeter cream.
Can I make this cake in advance?
Absolutely. This is actually a great make-ahead dessert. Bake the cake layers one day ahead, wrap them tightly in plastic wrap, and refrigerate. Make the chocolate cream and assemble the cake the next day for the freshest results.
Can I freeze the Claim Jumper chocolate cake?
Yes. Freeze individual slices or the whole assembled cake by wrapping tightly in plastic wrap, then foil. Freeze for up to 2 months. Thaw overnight in the refrigerator and bring to room temperature before serving.
What makes this the best Claim Jumper chocolate cake recipe?
The combination of sifted dry ingredients, room-temperature wet ingredients, brewed coffee in the batter, and a dark chocolate cream made from real egg yolks and whipped heavy cream is what sets this recipe apart. Every element is designed to replicate the deep, layered flavor and fudgy texture of the original restaurant cake as closely as possible.
Now you have everything you need to recreate the iconic Claim Jumper chocolate cake right in your own kitchen. From the moist, coffee-enhanced batter to the silky dark chocolate cream, every layer of this recipe is built to deliver that unforgettable restaurant-quality experience.
Whether you’re making it for a special occasion or simply treating yourself, this copycat Claim Jumper chocolate cake recipe is guaranteed to impress. Bake it once and it will become a permanent fixture in your dessert rotation – because some cakes are simply too good to only have at a restaurant.
You can also follow us on Pinterest, and YouTube for more delicious updates and kitchen inspiration. Your feedback and support mean the world to us!